Warning
While you can setup a change batch in advance, the changes should not be processed while users are logged in and using the system.
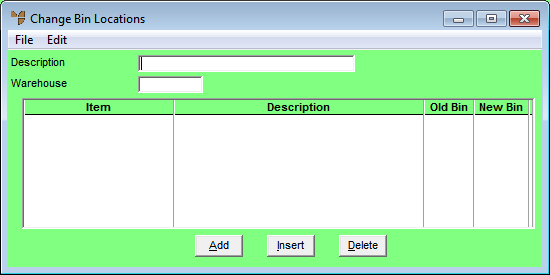
You can use the Change Bin Locations program to change the bin location details for selected items. This allows you to quickly fix incorrect bin locations. You create the bin changes in a batch that can be reviewed and amended before processing. A batch can contain a single item or multiple items.
|
|
|
Warning While you can setup a change batch in advance, the changes should not be processed while users are logged in and using the system. |
Micronet displays the Change Bin Locations screen.
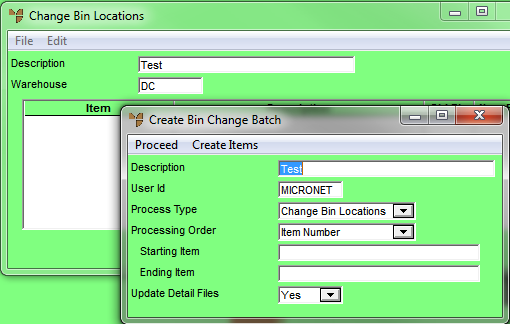
Micronet displays the Create Bin Change Batch screen where you enter the main (header) details for the batch, including selecting the items to be included in the batch.
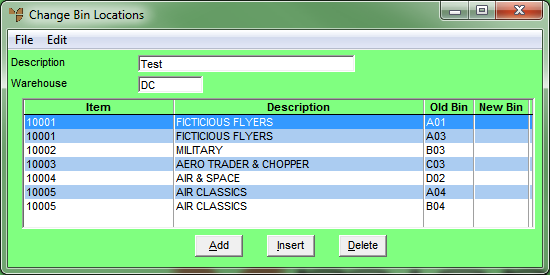
Micronet scans the relevant files and compiles a list of items and bin locations.
Micronet redisplays the Change Bin Locations screen showing the items to be moved.
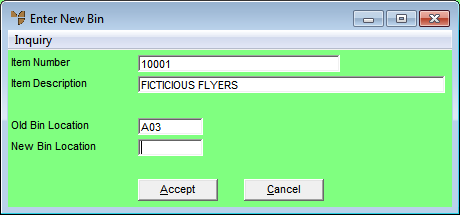
Micronet displays the Enter New Bin screen.